 VJam Docs
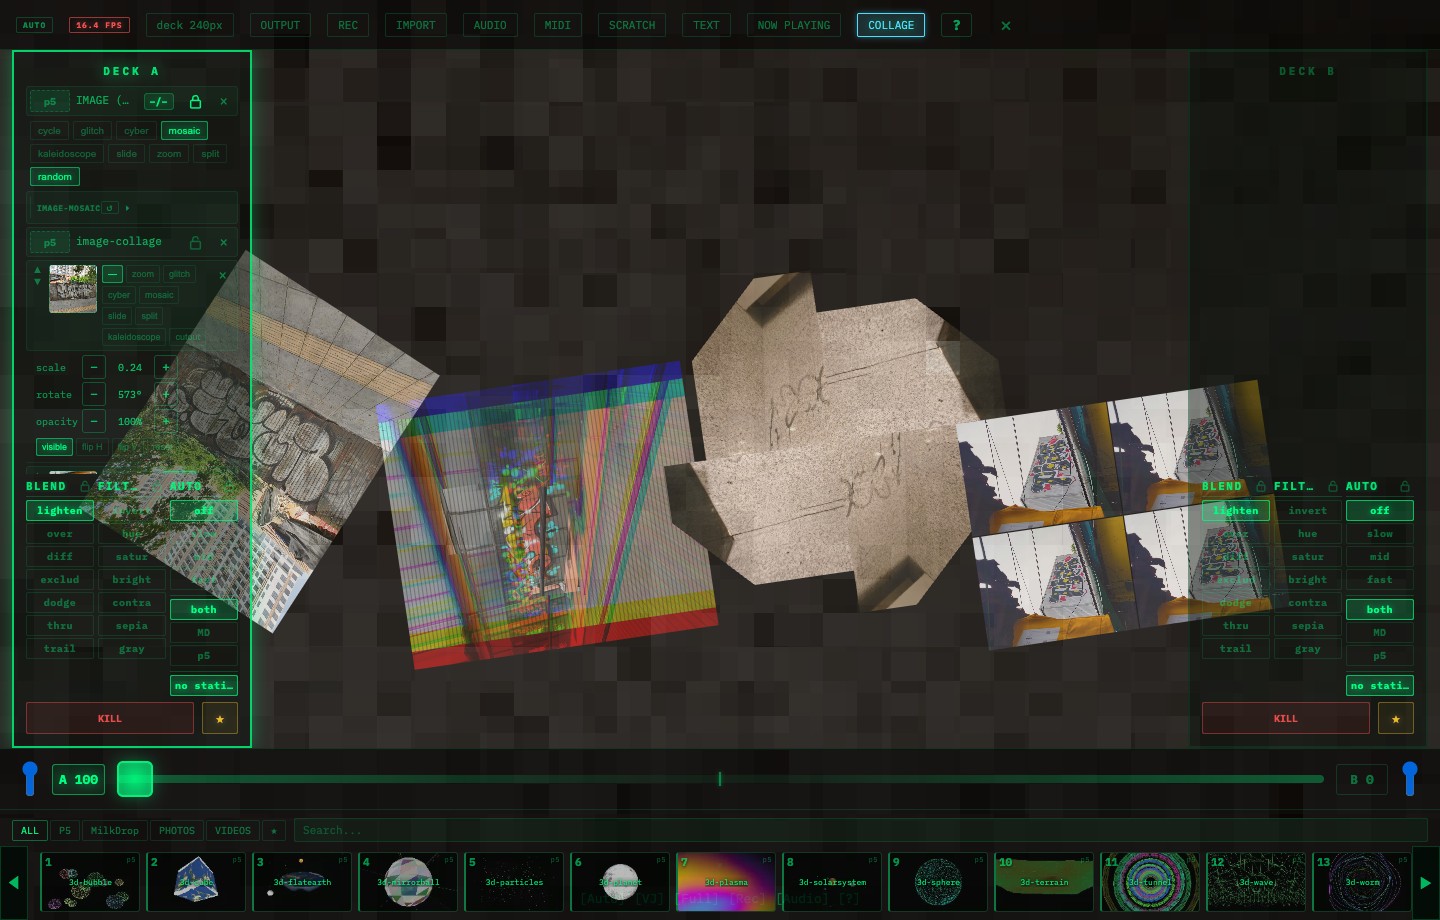
🧩 Collage
Collage places multiple images as separate on-screen parts. A normal IMAGE layer processes an image set as one visual layer. Collage lets each logo, photo, QR code, or cutout have its own position, size, rotation, opacity, and effect.
🖼️ Image vs Collage
| Feature | IMAGE | Collage |
|---|---|---|
| Mental model | One processed image set | Separate image parts on screen |
| Multiple images | Cycled or processed as a set | Shown at the same time |
| Position | Determined by the style | Controlled per image |
| Best for | Photo processing, logo layer, textures | Logo + photos + QR, composed screens |
🖱️ Workflow
- Add images to the library with IMPORT
- Press COLLAGE
- Add images from the image library
- Drag images on the screen
- Adjust each element from the deck layer list
🎛️ Per-Image Controls
| Control | Details |
|---|---|
| effect | none / zoom / glitch / cyber / mosaic / slide / split / kaleidoscope |
| scale | Size |
| rotate | Rotation |
| opacity | Transparency |
| visible | Show / hide |
| flip | Horizontal / vertical flip |
| cutout | Background-removed cutout mode |
| ↑ / ↓ | Layer order |
| × | Delete that image |
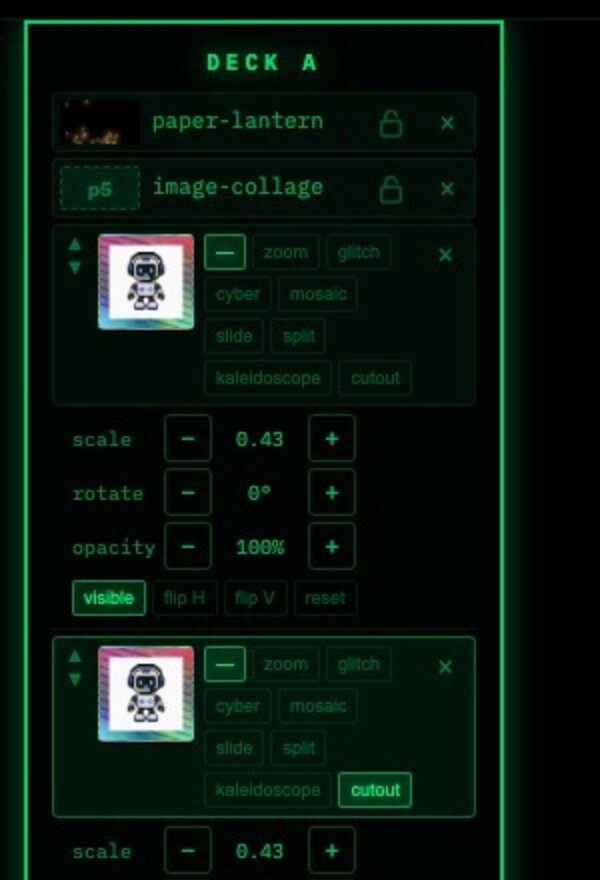
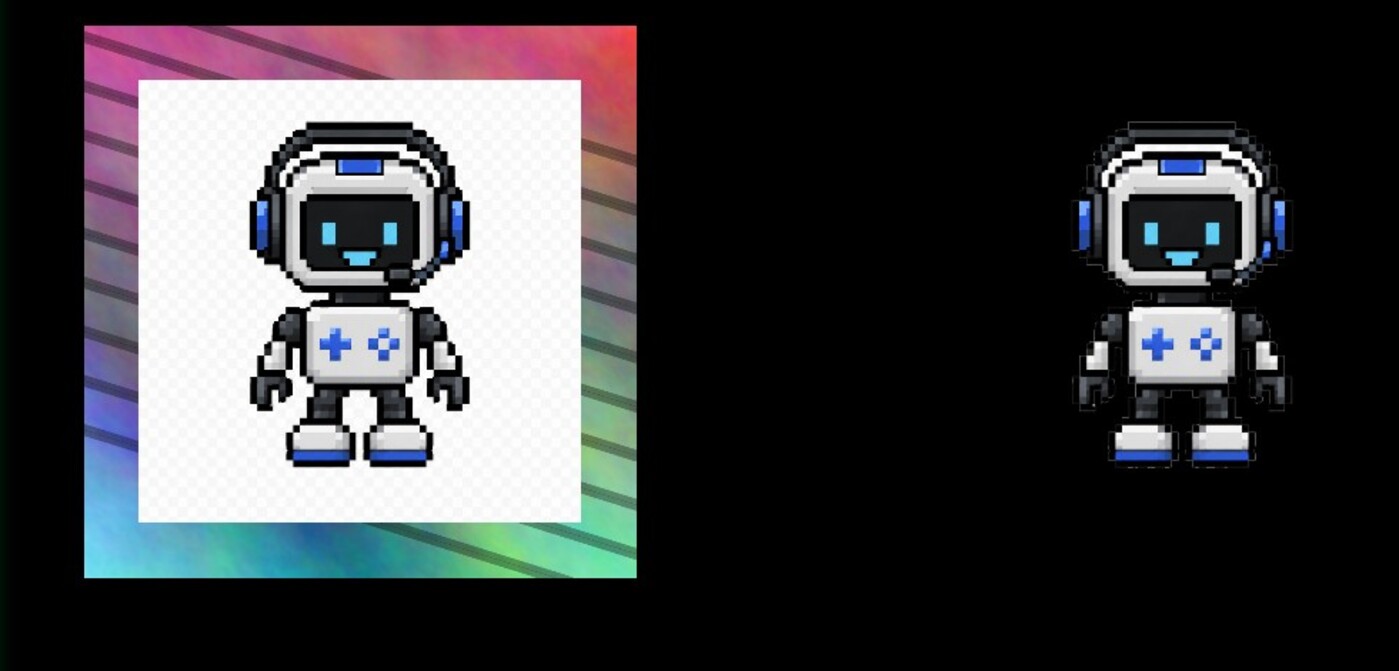
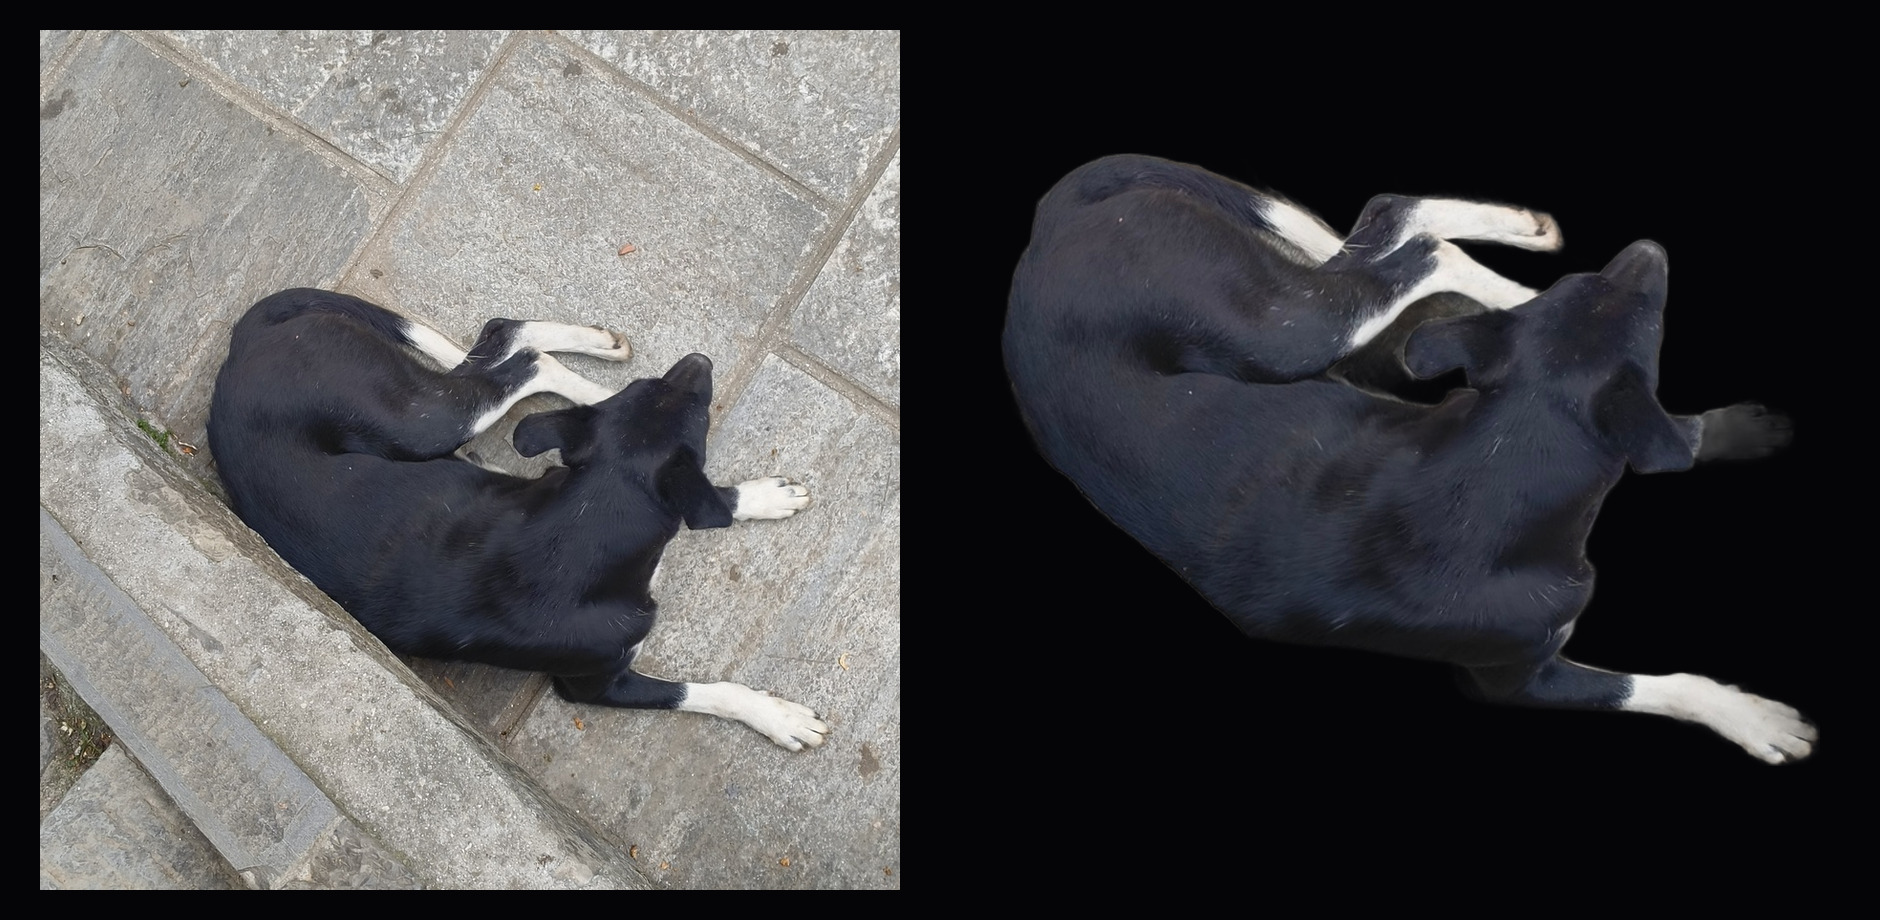
✂️ Background Removal: cutout
Turn cutout ON to switch an element to a background-removed version. It works best on images with a clear subject outline, such as logos, people, characters, and product-style object photos.
It also works with real photos. Images with one large, clear subject tend to become useful collage parts after background removal.
Workflow:
- Add an image to the collage
- Press
cutouton that element - After processing, the element switches to the cutout version
- Turn
cutoutOFF to show the original image again
The removal runs the first time you turn cutout ON, then the result is cached on that element. For a live set, prepare and check cutouts before the show.
✅ Works best with
- Strong contrast between subject and background
- Clear people, characters, objects, and logos
- Sticker-like or product-style assets
⚠️ Avoid for
- Subject and background with similar colors
- Hair, smoke, transparent materials, or very detailed edges
- QR codes or text that must stay readable
🎯 Good Uses
Use collage for composed screens: logo in a corner, photos across the canvas, a QR code during breaks, or a stream layout with background + branding + announcement.
🔒 Lock
Collage is still a deck layer. Lock image-collage when you do not want it to disappear during a set.